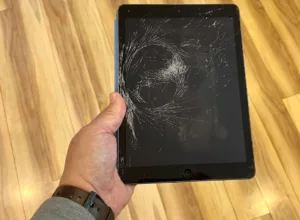
Many factors can contribute to your MacBook not charging. The majority of MacBook not charging issues are caused by faulty chargers, faulty batteries, and incorrect SMC data. Fortunately, these flaws are simple to correct.If your MacBook is still not charging after trying these solutions, you may require professional Mac repair services. We will go over your repair options, costs, and market services, including Apple Stores and independent repair shops.
1. Examine the power port or connector for dirt
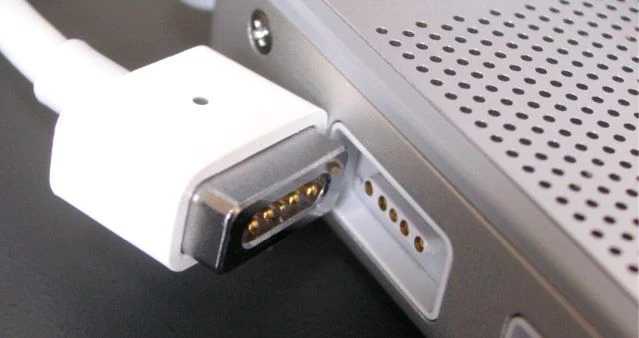
Examine the MacBook charging port and the MagSafe or USC-C connector for debris and burned marks. The MacBook charging port and MagSafe connector are held together by a strong magnetic attraction. Staples and paper clips, for example, are drawn to the charging port. These foreign objects keep the connector from getting too close to the charging port. Because of the extra resistor created by the loose connection, the connector may be hot.
In extreme cases, electric sparks can be seen. If you discover burn marks on the charging port or connector, clean or replace them as soon as possible before they cause further damage.
2. Magnetic End Repair for an Apple Magsafe Charger
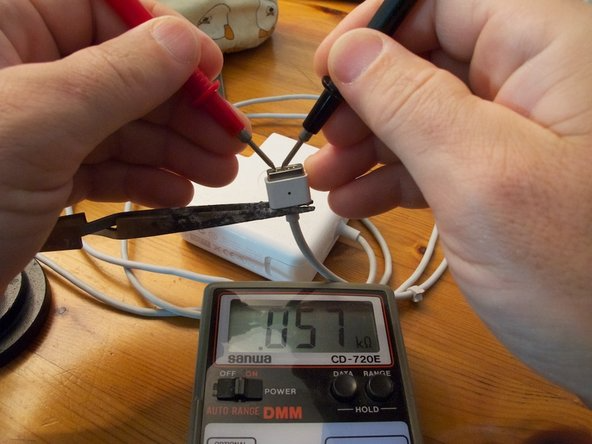
Begin by inspecting the cable for obvious cracks, holes, or exposed wires.
Check to see if the pins are shorted using a multimeter or a continuity tester.
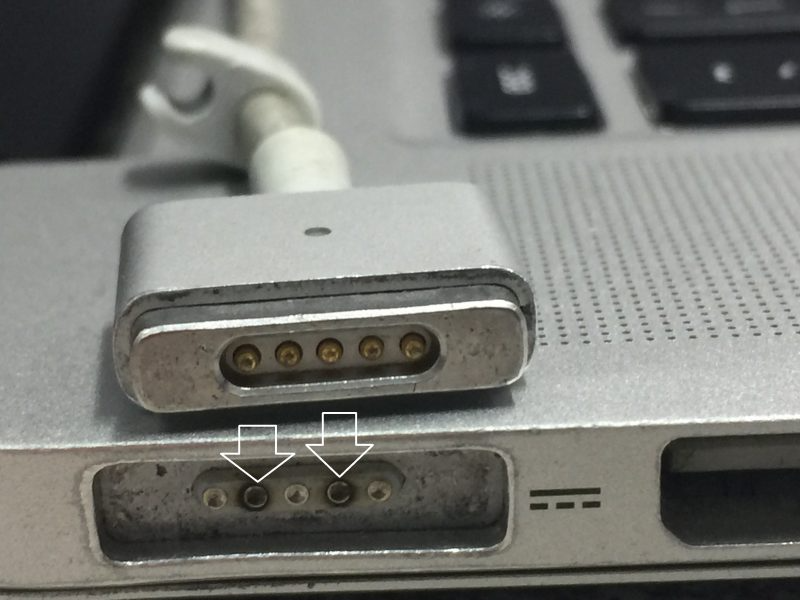
In the plug end, there are five pins. The central one is for signalling, but the other four are for powering the mac. Because the mag safe adapter is intended to be used in any orientation, the outer pins (1 and 5) are equivalent and should be connected when using the multimeter.
The same should apply to the middle pins (2 and 4).
If any of the remaining pins appear to be connected, you have a short. Pins 1 and 2 are shorted in this case.
3. Take out the PCB
Carefully pry out the tiny PCB and pull it out of the casing with a small flat head screwdriver or a pocket knife (knife is probably better).
4. Solder again
Before removing the wires, make a note of which side was soldered to which. To remove the broken wires from the PCB, use the soldering iron on the solder joints. It’s useful to have some kind of clamp or clip to hold the PCB while you solder it to keep it from moving around.
The cable should then be cleaned up: cut the cord, strip back the shielding to expose more wire, and twist the ground wire together. After cleaning the wires, solder them back onto the PCB.
Carefully pull the cord out of the plug and slowly replace the PCB in the casing. Bending the wires too much may cause them to break off at the solder joints.
Once it’s back in place, replace the magnet, making sure all of the pins go through the holes in the middle, and squeeze it back into the casing with the pliers.
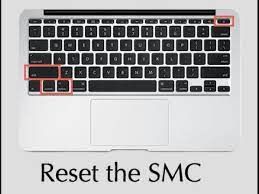
5. On a Mac with a removable battery, reset the SMC
If your MacBook Pro battery isn’t charging, resetting the SMC may be the solution. The Mac logic board’s System Management Controller (SMC) is a powerful chip that manages the battery and the status indicator lights.
The method you use to reset the battery on your MacBook Pro or MacBook Air will be heavily influenced by the age of your laptop. If your device is older than 2012, you will notice a rectangular section at the bottom. This is where the battery is. Follow these steps to reset the SMC on a laptop like that:
PRAM stores user-defined information such as screen brightness, keyboard backlight settings, and sound volume. If this data is corrupted, your MacBook will not charge or will charge very slowly.
To reset the PRAM, perform the following steps:
Keep the power button pressed for at least 5 seconds until the MacBook shuts down.
To turn on the MacBook, press the power button.
When you hear the chime or see any light on the screen, press Control-Option-R-P four times quickly until the MacBook restarts.
Let go of all four keys.
You have reset the PRAM after rebooting.
If you want to read informative blogs like this, visit our website, “ERIP Blogs“. Also, do visit our official handle, “ERIP“, where we provide home repair services for your home appliances and personal gadgets. You can easily schedule a repair by visiting our website “ERIP“, according to your convenience, and we will send an expert to your home to repair it.