Solved:Macbook-usb-port-repair

Solved:Macbook-usb-port-repair
WhatsApp
Facebook
Twitter

The USB port on your MacBook Pro is not functional. Buddy, you’re not by yourself in this. If this occurs, it is very understandable for you to become anxious. If a computer can’t be easily moved into or out of, what’s the use of having one?

What about accessories that need a USB connection to function? Simply said, you will only be able to use half of the system’s capabilities if your Mac’s USB ports aren’t working. You shouldn’t worry if you fall victim to this. You can find detailed instructions on how to fix the USB ports on your Mac in this page.

Methods to fix the macbook usb port repair

Method 1: Reasons Why Mac USB Ports Don't Work

These issues frequently arise out of nowhere and quickly. Your USB ports may function properly one moment, and the next you’re pulling out and inserting eight different external discs while pondering why on earth none of them are working. Although hardware or software issues are the most frequent sources of issues, there may also be other, less obvious causes.

Software configuration – Your USB port issues may be brought on by updating your macOS or even changing the setup of your Mac. Drivers that are incompatible or corrupt may also be at blame. Finally, though it’s improbable, a virus invasion could be the cause of the USB port issues on your Mac.

Hardware Problems – What happens when the USB port’s connecting wire to the motherboard comes loose? Your answer to that is already known. The USB ports on a Mac may have physical damage, which is a more evident hardware issue. You cannot completely rule out the possibility that dirt or filth may also cause issues with your ports.

Other Issues – Due to the many USB port types (USB-C, USB-A, etc.), issues could occur if the incorrect USB cable or device is inserted into a port. Sparks may fly if you attempt to use a high-speed accessory or device with a slow, outdated USB port (literally).

Method 2: Examine for updates

  1. Firstly, the system takes in warm air from the room.
  2. Then the warm air flows over the cold evaporator inside the system which cools down the air and the dehumidifier removes excess moisture from the air.
  3. The coolant present in chiller pipes absorbs the heat and evaporates it. Turning cold liquid into warm gas.
  4. This warm air is pumped outside and the coolant flows through the compressor unit and the condenser turns it back into a cool liquid.
  5. Cold air is then recirculated into the room, mixing it with air present in the room, cooling down the temperature.

Subscribe to Erip

Get the latest technology news, reviews, and opinions on tech products right into your inbox

Method 3: Restart the SMC

A quick repair for many hardware problems is to reset the System Management Controller (SMC). Whether you’re using a MacBook or Mac desktop will affect how you accomplish this.

Resetting a MacBook’s SMC

  1. Put your MacBook to sleep.
  2. Hold down Shift, Control, and Option.
  3. Keep all three keys in your hand and press the Power button.
  4. Hold the keys down for seven seconds.
  5. At the same time, release each key.
  6. Your Mac will start up normally and the SMC will be reset.
  7. On an iMac, Mac mini, or Mac Pro, resetting the SMC

Turn off your Mac:

  1. Cut the power supply.
  2. Reconnect the power cord once 15 seconds have passed.
  3. To start your Mac, hold down the Power button for 5 seconds.

Method 4: How Can I Recover Data from a Mac-Incompatible USB Drive?

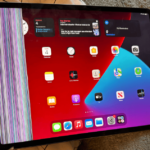
In order to recover its data, 4DDiG can identify the USB that isn’t functioning on a Mac. It is free, quick, simple to use, and gives you the most control possible when restoring data from a broken USB connection.

Important Hint: To access Mac files, users of macOS High Sierra and the most recent version of the operating system must first disable SIP.

Not to mention that Tenorshare 4DDIG Mac is the most reliable and beneficial recovery programme, particularly for restoring deleted files and folders on MacOS. Even if you have permanently erased the data from your trash, it can still recover all of those files in a matter of minutes, regardless of whether it is just a single photo or a stack of files in a folder.

Step 1: the process for using 4DDiG on a Mac to recover lost data when USB is not functioning. Install the free 4DDiG Mac software on your computer first, then launch it. Choose a storage destination, such as your hard disc or an external device with a USB port.

Step 2: Begin scanning whenever you feel it is appropriate. The 4DDiG will begin searching for files, and it won’t take long for it to display the findings.

Step 3: Choose the files or folders you want to retrieve from the files list that appears in front of you. To store the file in the location of your choice, select the recover tab. To be cautious, don’t save the file on the old website because doing so could result in permanent data loss.

If you want to read informative blogs like this, visit our website, “ERIP Blogs“. Also, do visit our official handle, “ERIP“, where we provide home repair services for your home appliances and personal gadgets. You can easily schedule a repair by visiting our website “ERIP“, according to your convenience, and we will send an expert to your home to repair it.

Facebook
Twitter
WhatsApp

Leave a Comment

Your email address will not be published. Required fields are marked *

Never miss any important news. Subscribe to our newsletter.

Recent News

Editor's Pick

× How Can We Assist Today?